Moving Hives, Harvesting Honey

It’s been a long time since I’ve updated, and lots has happened! We moved the bees on August 5th from the horse farm in Corcoran to their new home in Independence, MN. It was a giant, sweaty, painful, and long ordeal. George, Liam, Dave, and Guy (to whose property they went) did the heavy lifting and got the most stings. I ended up with one on my scalp, but Dave and George were covered in stings by the end, with well over a dozen apiece. (After a while, they lost count.) We started at 7:00 in the evening, after the bees were finished foraging for the day and were all back in their hives, and we ended at about 2:30 the following morning. It was not a fun experience.

Now that they’re at Guy’s, the bees seem to be adjusting nicely. Their numbers don’t seem to have decreased any, although the honey production has slowed. That’s probably more the fault of summer’s end than the move, though. Within the next couple of months, Guy would like us to move them again, from their current location to a different location on his property. We will wait until all the honey is harvested and the supers are all off, and then we will move them. We’re really hoping that this time goes more smoothly.

Speaking of removing supers, we took 4 of them to the Beez Kneez and completed our first honey harvest a couple of weeks ago, ending up with 110 pounds of honey! That amounts to about 11 gallons! This is our 4th year of beekeeping, and our total harvests have increased dramatically each year: Year one, none; year two, 17.5 pounds; year three, 77 pounds; and this year, 110 pounds (plus a little more in the end)! I have ordered bottles and will start getting the honey ready for sale soon. I’m also going to clean all the wax I collected and attempt to make candles. We will have one more small harvest in mid-October that might get us another 10-15 pounds of honey and a bit more wax if we’re lucky.

All of the hives except one are basically ready for winter, completely stocked with dozens of pounds of honey and pollen per hive. Soon, the bees that hatch will be “winter bees,” meaning that instead of the usual several-week lifespan of a honeybee, they will live several months in the hives, keeping the queen warm until spring, and only leaving the hive to defecate. When spring comes, the queen will start producing regular bees once again, that will only live a few weeks each.

Honey Time

Liam and I visited the hives today and the field was in full bloom with alfalfa, clover, and other wildflowers. It was beautiful. It was not surprising, then, to find that 4 of our 5 supers are full of capped honey and ready to be harvested! I left a message at Beez Kneez, where we do our honey extractions, to make an appointment for as soon as possible. In the meantime, we will add a couple of hive body boxes to the newer hives that need their third level, and new empty supers to all the hives.

The other big news in Tenacious BeeLand is that we are going to move our hives to a new location, yet to be determined.  The owners of the farm where we currently keep our bees will be hosting a wedding in a couple of weeks, and in preparation will be spraying their property with insecticide to help prevent the guests from being bitten by mosquitoes. Grrrrrrr. It’s a tossup as to whether I’m more livid with the family or heartbroken for all the bumble bees, the cute baby grasshoppers we saw by the dozens this morning, the butterflies, and all the other bugs that are good and helpful and beautiful. All to combat a few mosquitoes. Because of the spraying, we need to move all our hives or we will lose our bees. We are currently looking for a new permanent home for them, as I really don’t want to move them back to where they are now. Moving them once will be a big enough pain, and tremendously stressful for the bees; I don’t want to do it twice. We are looking into a few possibilities but haven’t settled on anything yet. We will soon though, since our time is severely limited.

So, to recap: The good news is we’ll have a good-sized honey harvest soon! The bad news is we’ll be moving our hives. Who knows though, maybe wherever we end up taking them will be an improvement over their current location. A shorter drive would be nice.

I’ll have more updates soon.

Best ever

This morning we checked on the bees again, and it is clear that there will be two honey harvests this year! We are having the best year ever this year, so far! The bees in all 5 hives are healthy, multiplying quickly, and making a lot of honey in their brood boxes and supers (which are the more shallow boxes on top where the queen doesn’t have access, so there are no eggs or larvae, just honey. Supers are the boxes we harvest).

We added another hive body box to one of the new hives, making it three boxes tall now, which is the final height it will be before we start adding supers. The hive body boxes are where honey and pollen are stored and brood are raised, and where the queen permanently resides. We will add hive body boxes to the other two new hives when we visit them next week, since they’re almost ready for them at this point. Once those are nearly full, we start adding supers to the tops of them.

It looks like we will have 2-3 boxes to harvest in July, which would give us around 15-20 pounds of honey. The next harvest will happen in September or October and will be the larger of the two, assuming everything continues to go well in the hives.

While inspecting hive #3, I felt a familiar and unwelcome jab on my hand, and sure enough, a bee had stung me right through my goat leather gloves! I don’t think the reaction will be too bad though, since the stinger barely broke my skin and ended up stuck on the outside of the glove. I couldn’t help but ask, “why me?” Why am I the one who always seems to get stung? What gives, ladies? Why do you keep jabbing me?

That’s okay. I still adore them.


Happy Hummers

Throughout May, George and I have checked on the bees a couple of times and they’ve looked fantastic. We’ve seen no signs of mites and the queens have been laying in nice patterns, producing healthy-looking, burgeoning hives. We kept meaning to check for mites using the powdered sugar method but with all the rain we’ve had lately, it’s been difficult. Understandably, bees get pretty irate when you open the hives in the rain. You’d get pretty mad if someone took the roof off of your house when it was raining too, right? So we kept putting off the mite tests, even though we knew it needed to be done. But there weren’t any outward signs of mites, unlike last spring, so I was feeling optimistic about it.

This past weekend, Liam and I went to check on the bees to see how they’ve been doing, and finally did the powdered sugar mite tests. The process goes as follows:

  • Pull out a frame and check for the queen, because you don’t want to include the queen in your sample. The frame should have lots of capped brood, and preferably with lots of drones since mites like drones the best.
  • Spray the bees on the frame with sugar water, weighing them down and making it harder for them to fly.
  • Taking a flat-sided measuring cup, gently run it over the bees vertically, causing the bees to fall into the cup; transfer the bees from the cup into a plastic mason jar. Continue this process until you have around a half a cup of bees (around 200 bees).
  • Place a screened lid on the plastic mason jar and pour 2-3 tablespoons of powdered sugar onto the bees inside. Shake vigorously for one minute to coat the bees. (No, this doesn’t hurt them but it probably confuses the hell out of them.)
  • Turn the jar upside-down and shake it vigorously up and down over a white plastic tub, so that powdered sugar and mites fall through the screen and land in the white plastic tub. The mites, which hang onto the bees’ backs, cannot hang on when the bees are coated in powdered sugar, so when the bees are shaken like this the mites fall off, through the screen, and into the tub, landing in piles of powdered sugar.
  • After shaking for a full minute, set the jar aside and let the bees rest. (They’re still okay!) Count the mites. If you have more than 6 mites per hundred bees (more than about a dozen), you have an infestation and you need to treat them with medication; otherwise, you have an acceptable level and can refrain from treating them.  
  • Release the bees from the jar back into their hive. They will crawl around looking kind of dazed while their hive-mates lick them off. Their discomfort in the name of science is greatly appreciated.

Normally, if you have multiple hives in close proximity and you find that one has mites you don’t need to keep testing all of them; you just treat them all, since the mites are so easily passed along from one hive to the next. However, if you test a hive and there aren’t mites, you need to keep testing the hives until you’re sure there aren’t any mites in any of them. So, Liam and I tested all five of our hives, finding virtually no mites at all! That optimistic feeling I had been having earlier in May was actually warranted! No mites! Hallelujah! This is tremendous news, since mites are a major cause of colony collapse, and treating them is not only expensive and a nuisance, it slows down the growth of the hive and the production of honey. Last year we treated our hives for mites in the spring and ended up not having any honey harvest until late summer. This year it looks as though we’ll have an earlier harvest.

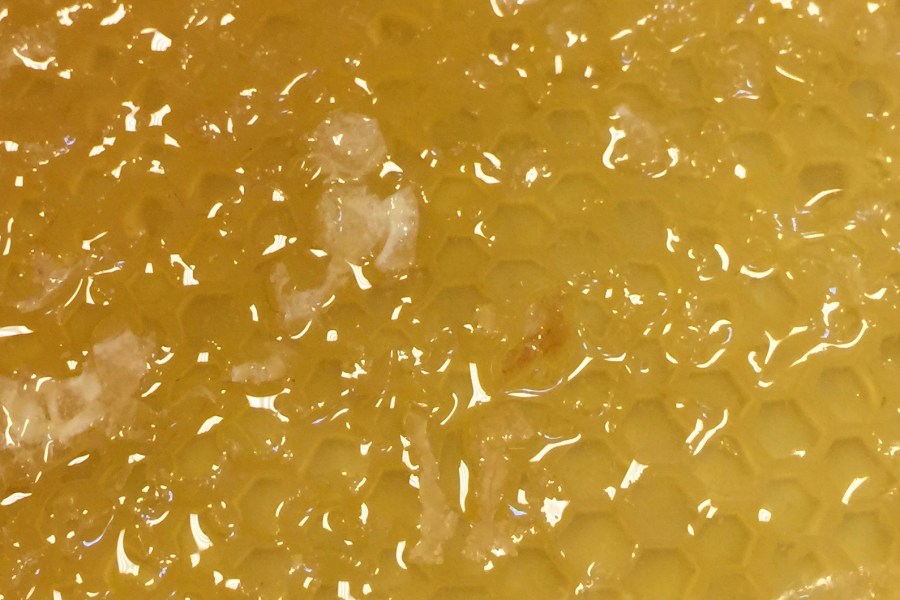
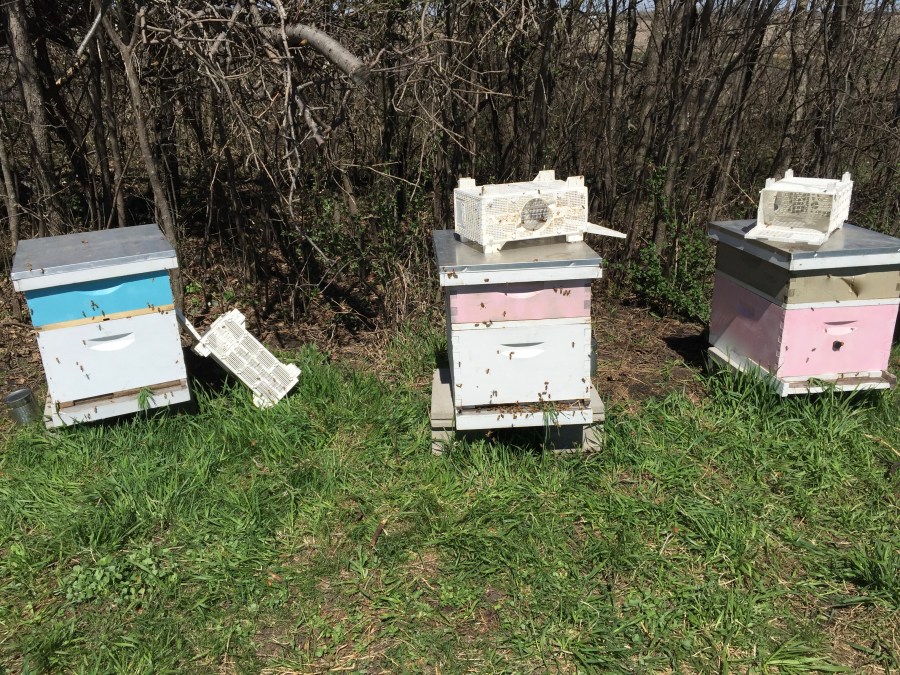
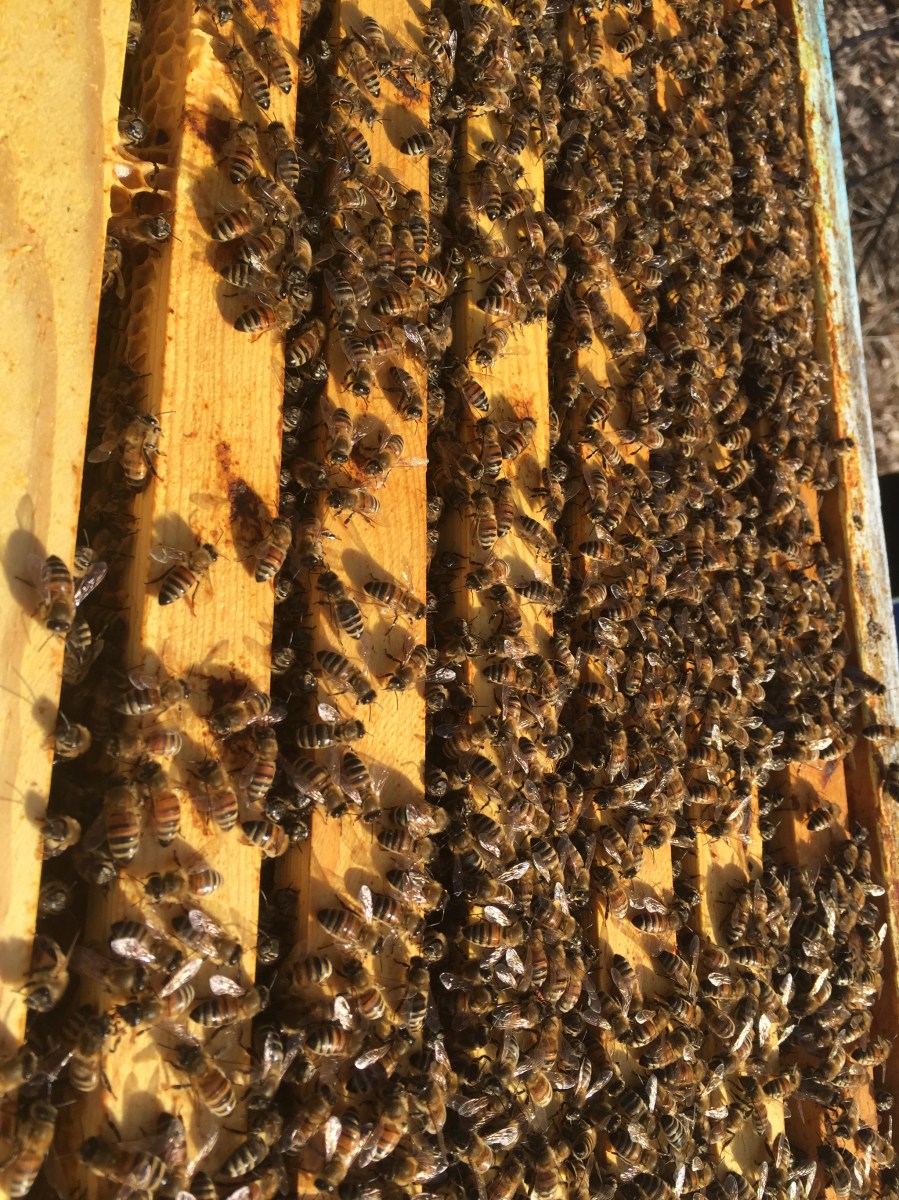
Two of our hives are leftover from last year, and are three hive bodies deep, all completely full with brood, honey, and pollen. They each have one super (shallower box for honey harvesting, where the queen can’t go to lay eggs) on top. On one of the hives, the super was already full of honey, albeit uncapped, so Liam and I added another super. This will keep the bees from feeling too crowded, and give them more space to work and expand. Within the next couple of weeks, they will make a wax cap on the honey in the first super, and start filling the second super with honey. The other older hive’s super was around half full, so we didn’t add another super quite yet, although we left one nearby so that next time we’re checking on them we can add it if they’re ready. We never want our bees to feel crowded; that’s when they are more likely to swarm, and we really don’t want that.

The three newer hives each just had one hive body box, and all three were full of honey, pollen, and brood when we checked them. Liam and I added another hive body box to each hive, so now they’re each two boxes deep. When doing this, we took a couple frames of brood and a couple frames of food (honey, pollen) from the first box and exchanged them for empty frames in the new box, to encourage the bees to move up into the second, new box. We want them to use that second box and expand, and not feel crowded. Moving a few of their frames into the new box helps with this.

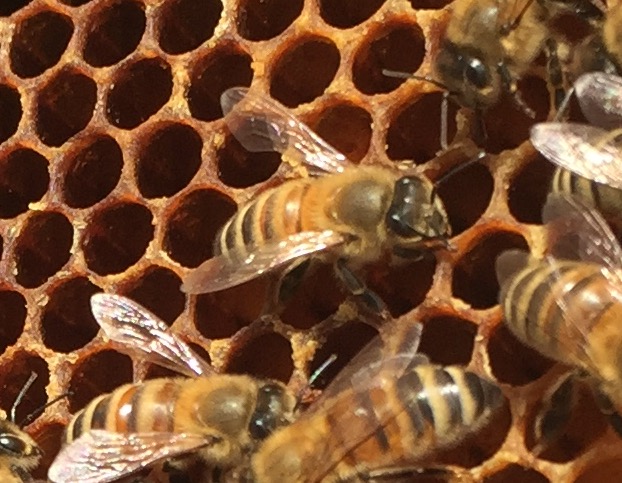
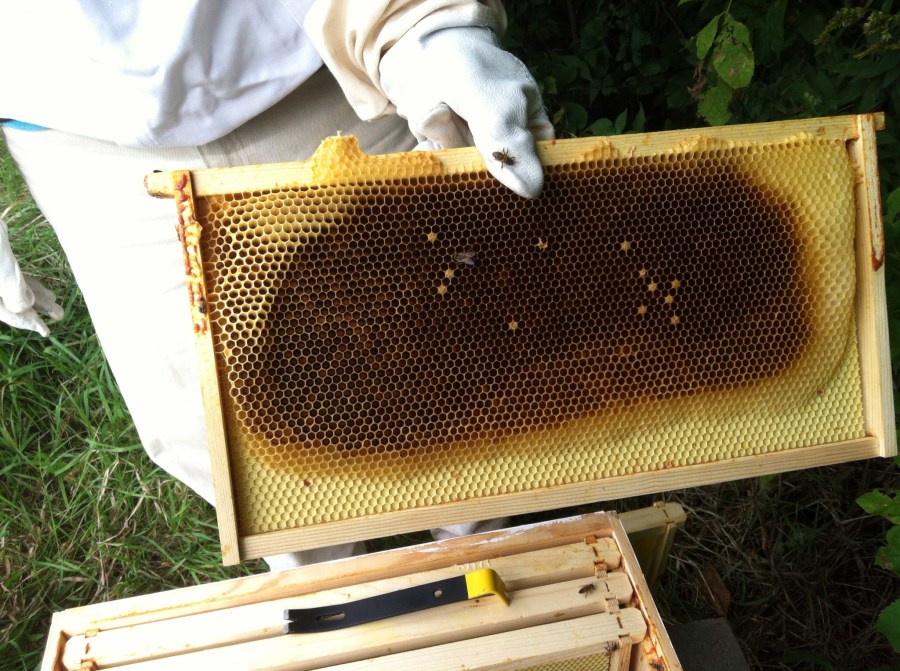
Speaking of crowding, this is the time of year when hives grow very quickly and are most likely to swarm so whenever we check on them, we need to check thoroughly for new queen cells and destroy them. If new queens are created, it means most of the colony is getting ready to go. While we were checking the hives, I pulled out frame after frame, looking for queen cells and squashing all the ones I found. Most were empty, which is typical. Bees often create queen cells, almost out of habit. But it’s still important to get rid of those cells. There was one hive, however, that had about five queen cells with royal jelly in them, meaning they were in the process of making new queens. I took a few photos, one of which is attached on the margin and labeled. Perhaps I should find a way to collect and save the royal jelly when I find it since it is extremely valuable, but I’m not that sophisticated yet. I’ll be reading up on it, though.

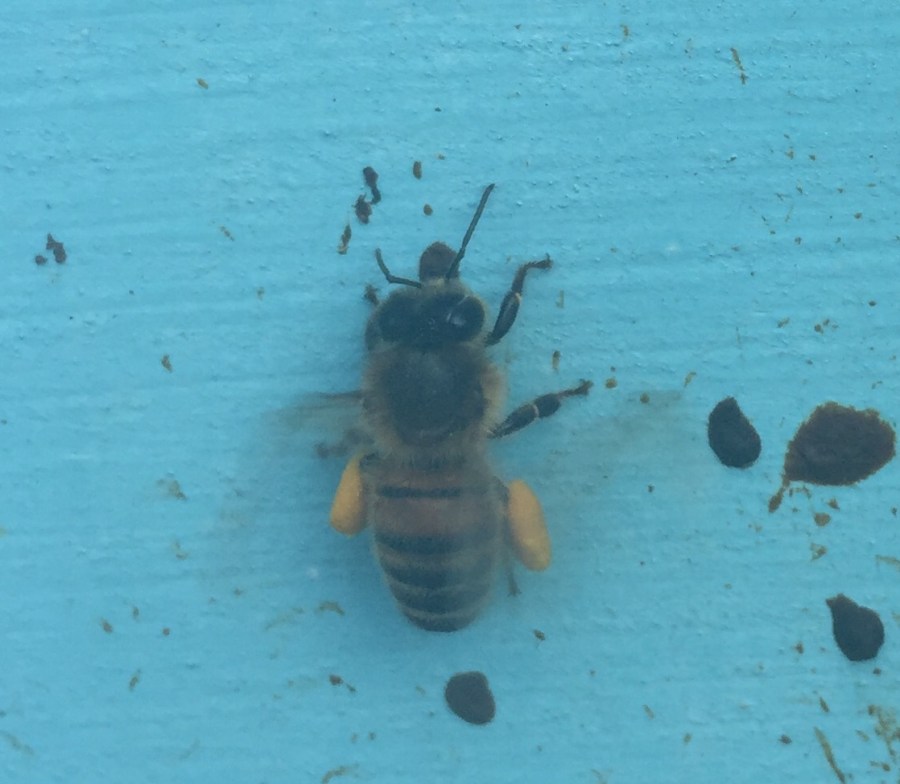
When checking the hives, Liam and I also noticed thousands upon thousands of fuzzing golden bees with downy fur around their beady little black eyes, shiny wings remaining folded. These were brand new babies, hatched within the past day or so, not ready to fly yet. I attached a photo of some babies on the margin, too. When babies emerge from their cells, they slowly poke their way out, soliciting passersby for any food to help them get through the entire process. Once out, they look like ugly alien creatures. They fluff themselves and stay sitting on the comb for a couple of days, feeding. From this stage, they become caretakers, feeding other babies, cleaning out cells, and tending to the queen, until they are ready to take their maiden flight and begin foraging.

All-in-all, Liam and I spent nearly four hours checking the hives. The end result was:

  • No mites in any of the hives
  • One super full of uncapped honey (and it’s not even June yet!)
  • We couldn’t find any of the queens, but they’re obviously working hard and laying well
  • Lots of brood, lots of babies
  • Lots of queen cells, most empty (typical), some with royal jelly, all destroyed
  • More space added to 4 out of 5 of the hives to prevent swarming

And to end on the best possible note, it didn’t rain, neither of us got stung, and neither of us found any ticks on us afterward despite wading through a field of grass and alfalfa that was up to my chin. On the way home, we stopped at DQ and picked up blizzards to celebrate! We were tired, but tickled with the results of the day.

Newbies (or, new bees)

Yesterday morning I drove out to Stillwater to pick up our annual order of bees. This year we purchased three 3-pound cartons of hygienic Carniolans, each with a queen. In the past, they’ve come in wooden crates that have fine screen on the widest sides, and a tin can in the middle with pinpoint holes in it that leak out sugar syrup to feed them. This year, the bees arrived in sturdy white plastic cartons (shown sitting next to and on top of hives in photo above, taken after the bees had been put in the hives) that had “bee bus” printed on the side. It was a challenge to get the first one open when putting them in their hive, but I got the hang of it and the second and third ones went much more smoothly. The boxes are much more sturdy, and fewer bees seemed to be escaping.

In the afternoon I met George at our hive site and we set up the three new hives alongside the two older ones. When setting up a new hive, you need a stable base a little off the ground, so we use cinder blocks that are as level as we can make them. Then there’s a wooden base piece for the hive, upon which you stack the hive bodies. To start a new hive, you use only one hive body box, and take out several of the frames in the middle before putting the bees in. In order to put the bees in, you liberally spray the bees through the holes in their carton with 1:1 sugar water syrup so that they’re good and sticky, and weighted down. Then you pry open the end of the carton and shake the bees into the open space in the middle of the hive body box. If they’re all in a big lump, gently spread them across the bottom of the box so that you can replace all the frames without mashing the bees.

The queen comes with the colony, but arrives in a tiny little box within the carton, separated from the rest of the bees. The queens are bred separately, and impregnated prior to being introduced to the colony. They are put in their little tiny cages and stuck inside the cartons with the rest of the colony right before being shipped across the country (our bees came from California), but if they’re with their colony for less than 3 days before being hived, it’s especially important to do what’s called a slow release method so that the colony gets used to the queen’s scent and accepts her.

The queen cage has a tiny little cork plug on one end, which is easily removed with a pocket knife. It’s important to do that gently and carefully, so as not to damage the queen in the process. After removing the cork, you replace it with a small marshmallow, then place the queen cage in between two of the frames (anywhere) in the new hive. The hive members will continue to get used to the queen’s scent and accept her while chewing through the marshmallow and releasing her within a couple of days.

Before closing up the brand new hive, it’s important to make sure it is fully enclosed so that the bees can’t leave for the first 24 hours. They need time to acclimate to their new home. All entrances are plugged with corks or grass. Since they can’t leave to forage, they must be fed during this time. A pollen patty and feeder tray are placed on top of the hive body box, then the telescoping cover can be put on. The hive is contained and has a day or so to get used to their new digs.

If it stops raining this afternoon, I might go check on them and unplug one of the holes in each new hive so they can start to forage. I’ll also do a more thorough check of the older hives to see if there are any more eggs or capped brood; we want to see continuing signs that the queens are healthy and productive right now. I’ll also spot-check again for any signs of mites.


Full speed ahead!

We visited our two hives the weekend before last to see if the bees needed pollen or sugar syrup to supplement them until things started blooming. No, there was no doubt that they really, really didn’t need either. There were hundreds of bees returning to the hives with legs full of pollen (as shown in the picture above), and the frames had lots of capped honey in them! We aren’t sure if the honey is leftover from last year or if our bees had found a source of nectar and were already producing more, but logic would dictate the former. There were still so many frames with capped honey, however, that it boggled the mind to consider how they got through the winter with so much left. There were also far fewer dead bees in the bottom of the hive this spring than in previous years, at least from what I recall.

I did see a few brand new eggs on a few frames, which means the queens are starting to lay again. But I did not see any larvae or capped brood. If the queens are active, they’re just starting. When there’s larvae, I’ll look for mites in the cells, especially in areas where there are capped drone brood, since varroa mites like drone bees the best. We are planning to do a sample test for mites but it seems more worthwhile to me to wait a couple of weeks and do it when there are more drones.


Bee kind

Public Service Announcement:

The other day I heard on NPR news (at least I think that’s where I heard it) that when the weather gets warm and people start working on outdoor home improvement projects, bees collect the sawdust of treated lumber as if it were pollen and take it back to their hives. Unfortunately, treated lumber is treated  – with insecticides, to keep termites from chewing it up. To bees, the sawdust looks like pollen and they collect it and fill their honeycomb with it, like in the photo above. Next thing you know, they’re waggle dancing and telling all their friends where to go and find the best pollen sources, and the whole hive is collecting treated lumber sawdust, thinking it’s a gift from heaven. In doing this, they might very well kill off the entire hive. So please, if you’re sawing away on treated lumber in your yard this spring or summer, please sweep or vacuum up the sawdust as best as you can so that the bees don’t collect it.

Here’s an article I’ve posted on Facebook that gives more great tips for how to help honeybees:

http://mentalfloss.com/article/87341/7-easy-ways-you-can-help-bees-right-now

Yay! Take “lawn treatment for dandelions” off your to-do list! Let ’em grow! Let ’em grow! I’m suddenly feeling inspired to write new lyrics to the song, Let It Go (from Frozen)…

Tenacious, indeed

This past weekend we checked on the bees to see how they made it through the winter. It was 53F and sunny – a perfect day for visiting them. The main agenda was to see how their numbers were looking and how much honey they had left. If their numbers were low, we would plan on replacing the hive. If their numbers looked good but they had little left in the way of food stores, we’d start feeding them sugar syrup soon so they wouldn’t starve before the world started blooming. In order to check on these things, all we needed to do was lift the lid off the top box and peek in; the bees and their honey would be accessible from the top, and the queen and any new brood she might have would be down in the lower boxes. Hopefully she’s not laying many eggs yet, though. It’s a bit early for that.

We decided that with the cool weather, the bees would probably be pretty calm and would remain in the hive while we checked them, so we left the smoker in the car. Liam and I put on our bee jackets, while George opted to skip using his. I did manage to forget to zip the hood on my jacket, so my head was completely exposed. Whoops. But as I said, we were quite convinced the bees would be docile.

Upon trekking out to the two remaining hives, however, it became clear that there was significant coming and going activity from the hives. I loosened the strap on the first one and lifted off the cardboard insulation and telescoping lid, then gently pried off the inner lid and moisture board with my hive tool. What I saw was the picture attached to this blog post: LOTS of bees! So, no problem with their population size. I poked my hive tool into some of the comb on the frames and it came out sticky, meaning there was still honey left for the bees to eat. After repeating this a few times, we decided this hive looked fantastic and closed it back up, insulation and all, since there’s snow in the forecast for later in the week.

The second hive was also full of energy. I loosened the strap and again pulled off the insulation and telescoping lid. This time, the inner lid and moisture board came with it, and the bees were immediately exposed. As I peeked in to check their honey stores  one bee flew up and stung me on my right jawline. Doh. That didn’t freak me out, but it then got stuck in my hair and I couldn’t brush it out. I tried to walk away from the hive, so as not to attract any more bee attention, because when one bee detects a threat she’ll release a pheromone that gets all the other bees excited too, and you’ll find yourself in the midst of some really angry insects. As I was stepping away from the hive, trying to gently remove Ms. Bee from my hair, I tripped on the hive base and managed to fall. Okay, now it was time for George and Liam to finish checking that hive on their own because I had to get up and move away from that hive before I clumsily did anything else to screw things up. I wandered 20 feet or so from the hive and had Liam come over to help me get the bee out of my hair, but it had since gone down into my jacket. I finally got it out, only to have it (or a different one?) fly directly down my shirt and into my bra. That is not something I’d recommend to anyone. After cracking a couple of jokes and delicately showing the bee the way out, I found myself bee-free and began heading back to the van for some Benedryl while the menfolk finished closing up the hives. I’m glad I only ended up with the one sting! George ended up with a sting under his left eye, as well. Liam, aka The Bee Whisperer, of course still maintains his record of no stings.

Things I learned: 1. Zip my bee jacket hood. 2. I don’t like bees in my bra. 3. When I’m stung on my jawline, I end up looking like a hamster who’s stuffed his cheek full and then never empties it. 4. Spending time treating and winterizing your bees well in the fall means they’ll look really, really good in the late winter.

The next step is to order more packages of bees, which I will do this week. I’m going to order three 3-pound boxes of hygienic Carniolan bees, and we will start three more hives in April to go with the two left over from last year, bringing us once again to five hives. This year I plan to be much more aggressive in looking and treating for mites, so honey production isn’t slowed down as much as it was last year.

Until then, I’m zipping my bee suit hood and bringing the smoker with us to the hives!